Welcome to this years sixth week of Dynamics GP New Feature Blog series, where we will showcase the top features requested by Microsoft customers and partners. Let’s get started!
Feature 20 – Change Approver for an Active Workflow Task
In Microsoft Dynamics GP (18.2.xxxx), We’ve added a new ability to Workflow, so that now Workflow Managers can change approvers on an existing workflow task that is active and has current documents pending approval from that approver.
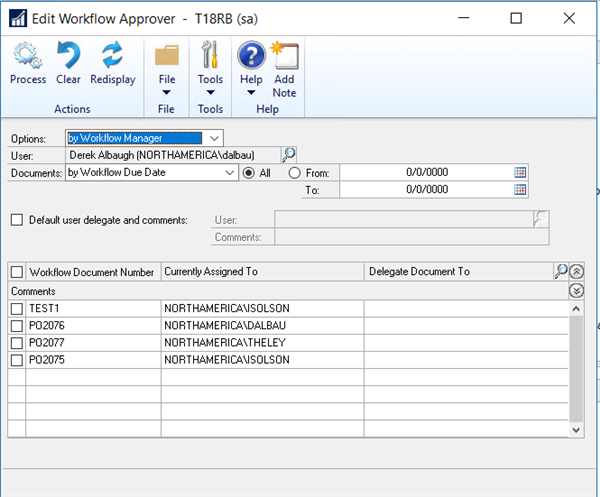
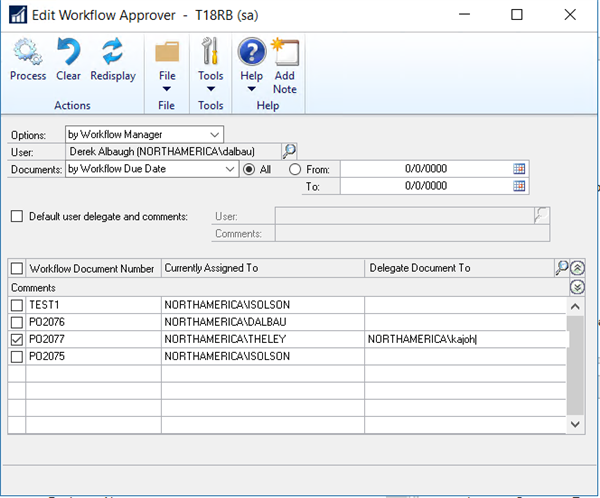
By using the new Edit Workflow Approver (Administration > Setup > Customer > Workflow > Edit Workflow Approver), Workflow Managers can now look at all workflows that are active, for all workflow types they are assigned as the manager:
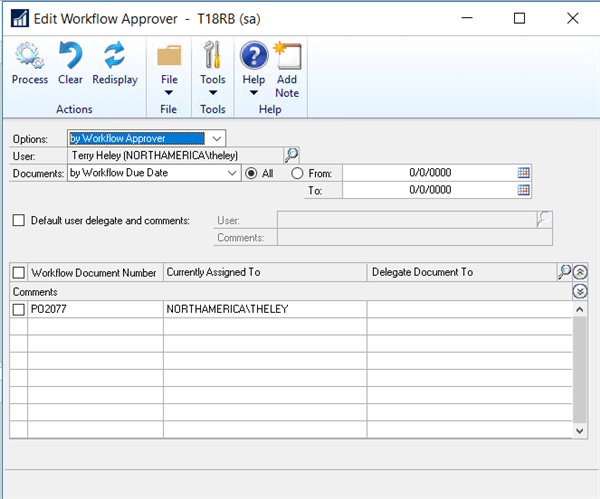
 ….or filter by workflows assigned to a specific approver:
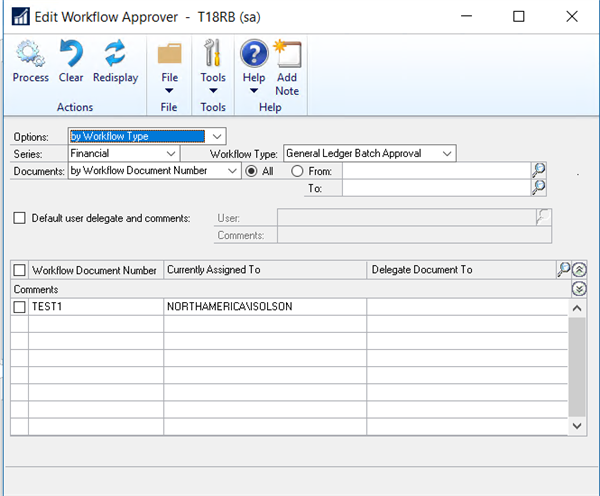
 ……..or look at a specific Workflow type, if they are assigned as a Workflow Manager over different types of workflows:
Once I choose ‘by Workflow Type’ and then the Series and Workflow Type, or choose ‘by Workflow Approver’ or ‘by Workflow Manager’, I choose to either filter by Workflow Document Number or…………, then click the ‘Redisplay’ button which will list those specified workflow for which I’m the manager, based on what options and filter I’ve applied.
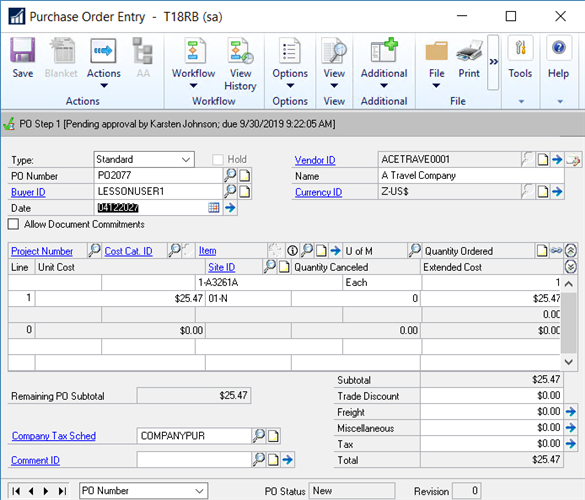
For example, I’m a Workflow Manager of both a PO Approval and GL Batch Approval workflow types. I have a purchase order, say PO2077, that I need to change the currently assigned approver on, because the current approver is going to be away or has left the company or whatever reason.
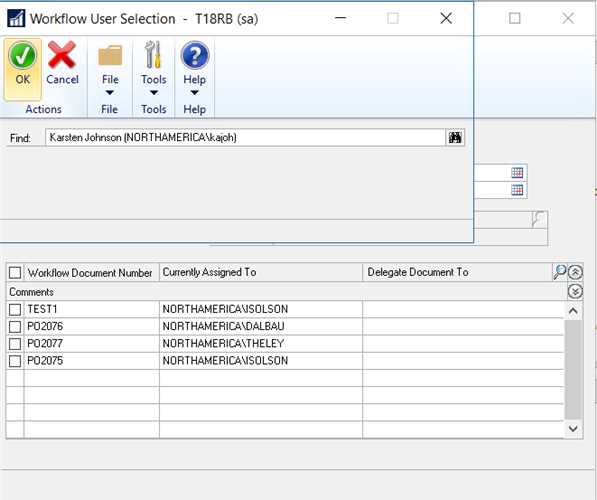
In the ‘Delegate Document To’ field for the workflow I want to edit, I click the magnifying glass/lookup button to bring up the Workflow User Selection window and select the approver of the workflow step I want to change.
I click the ‘Process’ button which will process the assigned approver on the workflow(s) I have specified in this window, showing a green progress bar at the bottom of the window.
Once it has finished, I can go back into the workflow that I made the change to and verify that the currently assigned approver has now been changed.
This feature will only change the currently assigned approver for the workflows that you select to change, this does not make any changes to the workflows or workflow steps in the Workflow Maintenance window, nor does it setup any type of delegation for any future workflows that may be submitted for approval.
***NOTE: If the workflow manager’s GP login is not assigned the POWERUSER security role, the only security role, by default, that gives access to the Workflow Maintenance and Edit Workflow Approver windows is the ‘ACCOUNTING MANAGER*’ security role. The default security task is the ‘ADMIN_COMPANY_013*’.
Also, if the workflow manager is not assigned the POWERUSER security role, in the Workflow Maintenance window, they will only see and have access to those workflow types that they are assigned to as a workflow manager, while the POWERUSER role user will see all workflow types.
***NOTE2: Because the ‘Edit Workflow Approver’ window is new to 18.02.xxxx / Microsoft Dynamics GP, you will need to have run the security insert scripts from the following blog, otherwise non-POWERUSERS will not be able to access this window:
Feature 21 – Vendor Approval Workflow: Enable workflow on Hold and Document Attachment
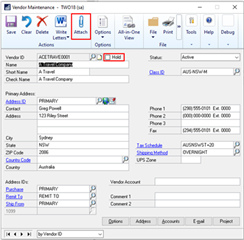
Vendors will now require approve if the Hold status is changed, or if a document is attached to the Vendor card. In previous versions these two actions would not require the vendor to be resubmitted for approval.
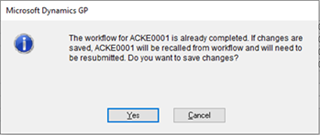
For example, if the Hold button is either marked, or unmarked on the Vendor Card, you will be prompted to resubmit the Vendor for approver in Workflow. Also, if a document is attached using the large paperclip on the Menu bar, then then you will be prompted to resubmit the Vendor for approver in Workflow.
Note: This feature requires a Workflow to be set up and active for Vendor Approval, and Document Attachment must also be enabled in order to be able to attach documents directly to the Vendor Card, rather than attaching documents to notes on the vendor. Documents attached to notes will not trigger a workflow resubmission.
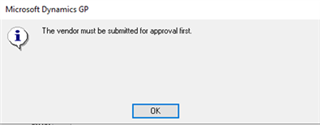
In both situations you will receive the following message:
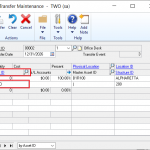
To access the Vendor Maintenance window, go to the Cards menu, point to Purchasing, and click Vendor.
Vendors will no longer be automatically marked as On Hold during the workflow process. Instead, while the Vendor has a Workflow Status of not submitted, recalled, rejected, or Pending Approval workflow status, a message will be presented to prevent new transactions from being posted until the workflow is completed on the Vendor.
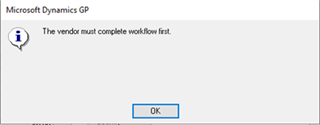
If a transaction was created before the change on the vendor was made, then a message will appear in the Edit List preventing you from posting until the workflow is completed on the Vendor.
Feature 22 – Web Client Keyboard Shortcuts
In Microsoft Dynamics GP, keyboard shortcuts have now been added to be included in Web Client for Microsoft Dynamics GP.
Some of the shortcuts available are the following:
–General Shortcuts
Ctrl+C Copy
Ctrl+V Paste
Ctrl+P Print
Ctrl+A Select All
Ctrl+W Close the current window
ALT+F: Activates the File menu in a GP windo
ALT+E: Activates the Edit menu in a GP window
ALT+H: Activates the Help menu
Alt + X: Tools option on browser window (IE)
Alt + D: Address Bar in browser window (IE)
Alt: Toolbar (File, Edit, View, Favorites, Tools, Help) on browser window (IE)
–Window Navigation Shortcuts
Tab: Move to next field
Shift+Tab: Move to previous field
Enter: Default button on a window
Ctrl+Tab Move from scrolling window to next field
Shift+Ctrl+Tab Move from scrolling window to previous field
–Tools Shortcuts
Ctrl+Tab Move to next toolbar command
Ctrl+Shift+Tab Move to previous toolbar command
Ctrl+ 1: Home page is displayed
Ctrl + 2: Financial area page displays
Ctrl + 3: Sales area page displays
Ctrl + 4: Purchasing area page displays
Ctrl + 5: Administration area page display
Ctrl + 6: Inventory area page displays
Ctrl + 7: HR & Payroll area page display
Ctrl + 8: Manufacturing area page displays
Ctrl + 9: Project area page displays
Alt+Right Arrow / Left Arrow Forward and Back buttons
–Windows Specific keyboard shortcuts:
There are also keyboard shortcuts that are specific to the actual GP window you’re in, though a lot of these shortcuts are similar from window to window. some examples of this are:
Purchase Order Entry window
–Ctrl+T Create Temporary Vendor
–Ctrl+D Display Vendor Item Detail
–Ctrl+E Open Item Detail
Purchase Order Inquiry Zoom
–Ctrl+D Display Vendor Item Detail
–Ctrl+E Open Item Detail
Receivings Transaction Entry
Ctrl+T Create Temporary Vendor
Ctrl+D Display Vendor Item Detail
Ctrl+E Open Item Detail
***Please note this isn’t a complete list of shortcuts, but examples of what can be used in Web Client for Microsoft Dynamics GP, like you can when using the thick client of the GP application.
Feature 23 – Web client General Ledger copy and paste (HUGE request)
This was one of the most requested features from the customer community, and because of the complexity of Web Client this was not an easy task, but you asked and its finally here!!!
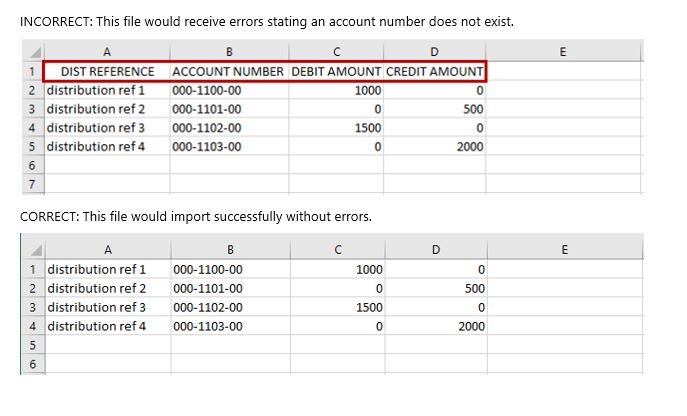
With the new release you can now import journal entry lines from an excel file using the Paste button on the menu bar of the General Ledger Transaction Entry window. Just like the desktop client, the format of the data in your excel file is the same with the exception that you must not have a header line on your file. In my below example, the first row contains headers that describe each column.
NOTE: There is no header information in the Excel document
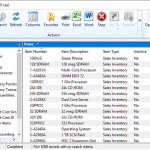
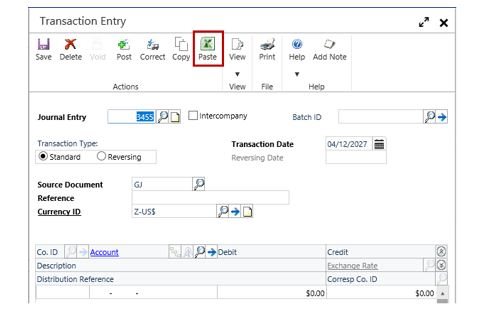
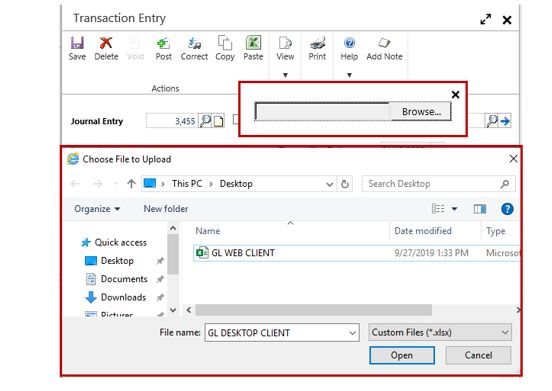
To access this feature in Web Client, Expand the Area Pages menu on the left navigation pane and click on Financial Microsoft Dynamics GP menu, then under Transactions, Financial, Click General. This opens the Transaction Entry window with a new Journal Entry. Click the ‘Paste’ button on the menu to open a Browse window, where you can select the Excel file holding your Journal Entry data. This is slightly different from the Desktop Client as we do not actually paste the data, all data on the selected excel file will be imported to your Journal Entry.
 Browse to the location of the Excel file, select it on the list and click the Open button.
 Upon Clicking the Open button, the Journal Entry lines from the Excel file will be pasted/imported into the window. A spinning circle indicating that the process is still working will appear between the SmartList link and the User Date on the Microsoft Dynamics GP Menu Bar. This will disappear once the process has completed. Please wait for the process to complete before continuing to other activities in your Web Session.

A report will print only if there are errors detected in the file such as invalid accounts.
Note: The Paste button will only be enabled if you are entering a new Journal Entry. Existing Journal Entries are not compatible with this feature in the Web Client or Desktop Client.
Note: All data on the Excel file will be pasted into a single Journal Entry, so you must have one file per Journal Entry that you are intending to upload.
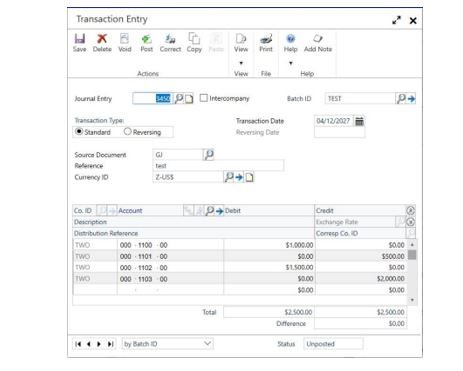
Transaction in web client after the above process.
And that wraps it up for this years week 6 of Microsoft GP New Feature blog series. For more information/documentation on new features please check out Microsoft Dynamics GP New Feature Blog Series!
Contact us to learn more about our commitment to help customers implement their financial and business management systems. Team up with a certified, Microsoft Gold Partner to make your migration to the cloud seamless. Or if you have any questions regarding Dynamics 365 or other ERP/CRM systems, you can contact us here.
Don’t forget to follow us on Facebook, LinkedIn, and Twitter. Subscribe to our YouTube channel for insightful tutorials and demos.